SOUND ManualSCSP / DSP Linker User's Manual
BackForward
SCSP / DSP Linker User's Manual

4. Algorithm edit


Create link information by specifying the module to be linked and the connection of the module in the algorithm edit window.

■ Module placement

Arrange the modules as follows:

  1. To place I / O modules, select “I / O Modules” from the Window menu.
    To place an effect module, select “EffectModules” from the Window menu.
    The module selection window opens.

  2. Click the module you want to place from the module selection window and click the “Select” button, or double-click the module.
    The module will be placed at the last clicked position in the algorithm edit window. If you have never clicked in the Algorithm Edit window, it will be placed in the upper right corner.

  3. Drag the placed module to move it to the appropriate position.

■ Wiring

The modules are connected by clicking the input and output ports of the two modules to be connected in order.

  1. Click the port on the first module.
    The port and the connections that connect to it are selected.

    To delete the connection, press the delete key or select "Clear" from the Edit menu.

  2. Click the port on the second module.
    The first port and the second port are connected.

    When you click on the second port, a check is made to see if you can connect. If the connection is not possible, the first port will be deselected and the second port will be selected (considered the first).

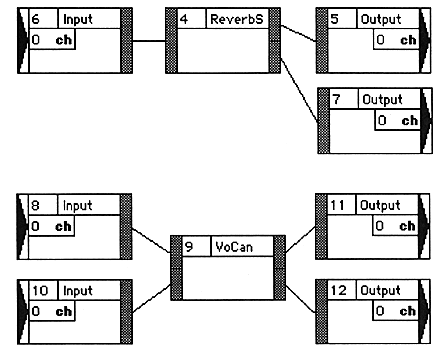
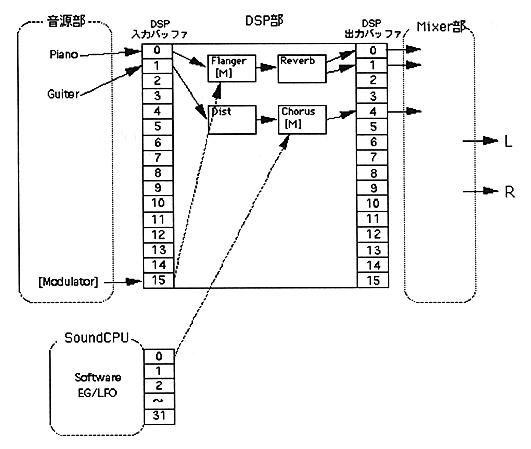
    For example, you can connect the following:

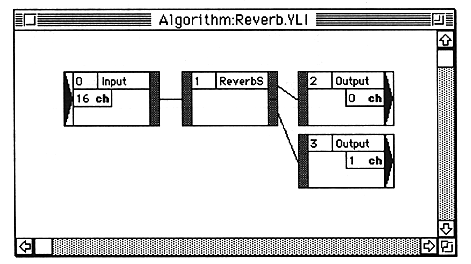
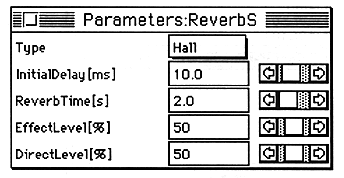
Please note the following when operating the wiring.

■ Module and wiring selection

To cut or copy a module or connection, you need to select the module or connection in advance.

The display of the module is as follows.


To select a module, click on the module selection field, ID display field, or name field. In the selected state, the module selection field is black and the outer frame is highlighted.
To select multiple modules, press Shift + click.

■ Module ID assignment

When you make a connection, a module ID is automatically assigned to each module. As a general rule, the module ID connected by wiring must increase from the input side to the output side.
Module IDs are assigned in the order in which they are connected. Please note the following:

Example of correct module ID

Incorrect module ID example

■ Reassignment of module ID

The links are in the order of module IDs. However, the module IDs are assigned in the order of wiring, so it may not be in the desired order. In such a case, you need to reassign the module ID.

  1. Double-click the ID of the module to be reassigned.
    The Renumber dialog is displayed.

  2. Enter the value you want to change and click “OK”.
    The module ID will be changed.
    If the IDs are duplicated or discontinuous as a result of the change, the IDs of other modules are automatically adjusted so that they are consecutive IDs.

■ Parameter edit

  1. Double-click on the module selection field.
    The parameter edit window is displayed.

  2. Change the value by moving the scroll bar with the mouse or clicking in the value display frame and then entering the value directly.

■ Definition / use / cancellation of global coefficients

Global coefficients are coefficient data (data stored in the coefficient RAM inside the DSP) that can be shared between multiple Effect modules. Globalizing the parameters has the following benefits:

The parameters that can be globalized are limited to those displayed in the unit of "%" on the parameter editor screen of each module. Also, there is one user-defined global information for each algorithm.
Globalized parameters can be edited in the Define Global window. In addition, parameters globalized with the same global coefficient change in tandem by editing in the Define Global window.

Define Global window

AlterToGlobal window

● How to define

  1. Select “DefineGlobal” from the GlobalCoef menu.
    The Define Global window opens.

  2. Click “Add” to add it, and click “Del” to delete the selected one.
    To change the value, type from the keyboard or use the scroll bar.

● How to use

  1. On the parameter editor screen, select the parameter you want to globalize.

  2. Select “AlterToGlobal” from the GlobalCoef menu.
    The AlterToGlobal window opens.

  3. Select the global you want to use and click “Alter”.
    The global is confirmed and you are returned to the parameter edit window.
    In the parameter edit window, the selected global is displayed in the value display field.

● How to cancel

  1. Opens the parameter edit window.

  2. Global Select the coefficient to be deglobalized from the specified coefficients.

  3. Select “RevertToLocal” from the GlobalCoef menu.
    Global is released. In the coefficient value display field of the canceled coefficient, the value specified globally is displayed.

■ Specifying the input buffer for the modulator

Some module symbols have an “M” button. In such a module, the link cannot be executed unless the input buffer number for the modulator (DSP input buffer number) is set. The numbers that can be specified are as follows.

  1. Click “M” on the module.
    The input buffer setting dialog for the modulator is displayed.

  2. Specify the buffer number and click “OK”.
    The buffer number is set.

● About the input buffer for the modulator

The modulator input buffer is a buffer for capturing the waveform created by the SCSP sound source section (SoundSlot EG / LFO) or sound CPU (Software EG / LFO) into the DSP section as an LFO or EG. The hardware reserves and uses part of the DSP input buffer for musical tones (for SoundSlot EG / LFO) or part of the DRAM area for DSP (for Software EG / LFO) for this purpose. For details, see the figure below.

■ Size To Fit function

The module display on the algorithm edit screen may not fit in the frame and you may not be able to see all at once.
In such a case, select “SizeToFit” from the Window menu to reduce the algorithm on the algorithm edit screen so that you can see all of the algorithms at once.
A check is displayed to the left of the menu item while it is displayed in SizeToFit. During this time, the algorithm cannot be edited. Please note that this feature consumes a lot of personal computer memory.


BackForward
SOUND ManualSCSP / DSP Linker User's Manual
Copyright SEGA ENTERPRISES, LTD., 1997